 Omnet下使用Inet官方demo说明

《Omnet下使用Inet官方demo说明》由会员分享,可在线阅读,更多相关《Omnet下使用Inet官方demo说明(14页珍藏版)》请在装配图网上搜索。
1、精品文档,仅供学习与交流,如有侵权请联系网站删除 INET Framework for OMNEST/OMNeT++ A Guided Tour Contents Introduction Launching the ARPTest simulation The GUI at the first glance Lets run the simulation! Over? You can restart it! OK, but what are those flashing link colors? What is inside the hosts and routers?
2、 Steps towards exploring ARP ARP begins The ARP Request packet The pending queue The ARP cache Transmission over Ethernet ARP Reply Processing the ARP Reply The clients SYN gets to the server Following ARP from the documentation Conclusion Introduction The purpose of this tutorial is to
3、get you familiar with the INET framework, a simulation model suite for TCP/IP and Internet-related protocols, written for the OMNeT++/OMNEST simulation environment. This tutorial is based on the ARPTest example simulation. To try it, you need a binary (executable) version of this simulation. The e
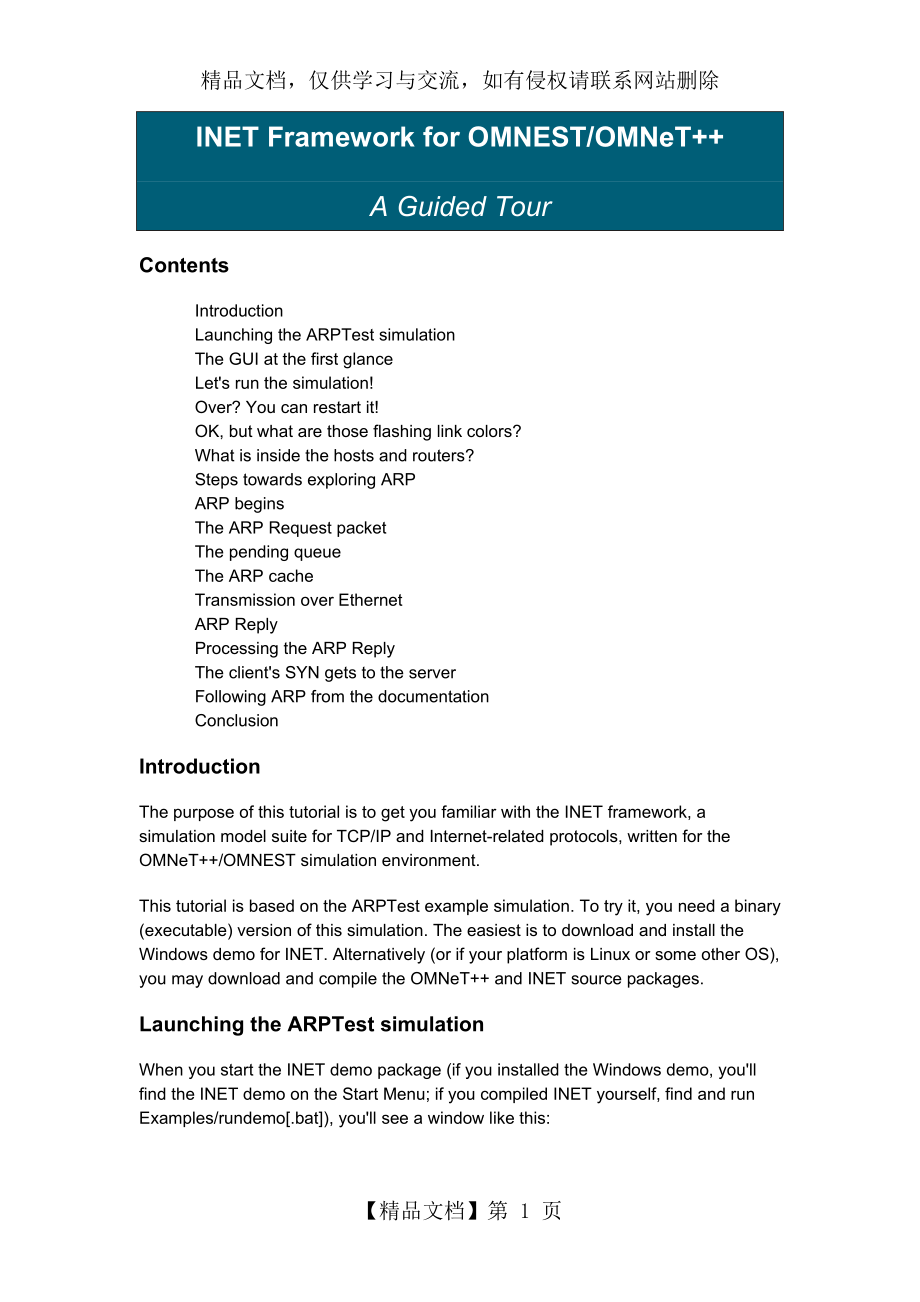
4、asiest is to download and install the Windows demo for INET. Alternatively (or if your platform is Linux or some other OS), you may download and compile the OMNeT++ and INET source packages. Launching the ARPTest simulation When you start the INET demo package (if you installed the Windows demo,
5、youll find the INET demo on the Start Menu; if you compiled INET yourself, find and run Examples/rundemo[.bat]), youll see a window like this: Click the button which says "ARP Test" on the left -- a description of the model should appear in the main window. Click the large "Launch" button on the b
6、ottom, and the ARP simulation model should start. The GUI at the first glance The picture you see will look like this. The window in the back is the main OMNeT++/OMNEST window, closing it will exit the program. The large text window on the right side displays log messages from the simulation mo
7、del (output from ev << statements in the C++ code will write there), and the left-hand displays the model objects in a foldable tree form. Theres a 3-line status bar at the top (well look at it later), and a toolbar to access frequently used functions of the GUI. The front window displays the simu
8、lation model. If you happen to accidentally close it, you can open it again by clicking the "Inspect network" toolbar icon. Lets run the simulation! Click on the "Run" button on the main windows toolbar, or hit F5. First you should see messages labelled "autoconf" being exchanged by the nodes,
9、as part of the Ethernet model autoconfiguration process: Then, at about 1ms simulation time, autoconfig finishes, and simulating the network operation begins. In the model scenario, the client computer (laptop icon) opens a TCP connection to the server (server icon) at 1s, and starts sending a lar
10、ge data stream. The server will just echo the data sent by the client. Since the underlying network is Ethernet, before being able to send the TCP SYN packet the client has to perform an ARP request to learn the MAC address for the default router. After some more messaging, the TCP connection will
11、 be established and data transfer begins. Well explore these happenings in the network later, but for now just sit back and watch the simulation. You can make the animation faster or slower by adjusting the slider at the top of the network window. You can stop the simulation by clicking the red
12、"STOP" traffic sign icon (or by hitting F8), and resume it ("Run" icon or F5). The "Fast" icon or (F6) will turn off message animation and update the graphics only every 10 events or so (the exact number can be configured in the Simulation Options dialog, Options menu, accessible from via the tool
13、bar as well). The "Express" icon provides the highest speed: it turns off all GUI functions while the simulation is running, even writing to the log is turned off. Express mode updates the display every 1000 events or so (also configurable in Simulation Options). In Express mode you can only stop
14、the simulation by clicking the "Big Red STOP Button" (see below). Simulation speed in Express mode may significantly depend on the state of the "auto update inspectors" checkbox. You can read the speed of the simulation on the 3rd line of the main window status bar. Ev/sec tells you how many event
15、s your CPU crunches in a second -- this depends on the strength of your hardware, on the amount processing (C++ code) to be done for an average event (refer to the handleMessage(cMessage *) functions in the model source), and on the run mode (Normal, Fast or Express). It is not unusual for the Expre
16、ss mode to be 100-200 times faster than Fast mode. The other two readings on that status bar are simsec/sec (how many simulated seconds the model progresses in one "real" second) and ev/simsec (how many events your model contains per simulated second). The simsec/sec value is useful for estimati
17、ng how long your simulation will take. Ev/simsec is independent of whether you use Normal, Fast or Express mode, and it only depends on the nature and size of your model (ATM cell-level simulations will have a few magnitudes higher ev/simsec values than call center simulations.) Over? You can rest
18、art it! While in Expess mode, youll probably get the following dialog after a while: "No more events" is one way a simulation can terminate normally (i.e. not with an error). It means that theres nothing more to simulate -- in our simulation this occurs when the client has successfully closed the
19、 TCP connection and finished its operation, and therere no more packets underway and no timers running anywhere in the whole model. Other simulations may end with the "Simulation time limit reached -- simulation stopped" message which means that the simulation time configured in omnetpp.ini has be
20、en reached. (For completeness: other possibilities include "CPU time limit reached," and "Simulation stopped with endSimulation()" meaning that some component in the model called the endSimulation() C++ function -- for example when it detects that desired statistical accuracy has been reached). In
21、 both cases you can restart the simulation using the "Rebuild network" command on the Simulate menu. In fact, you can do that any time to start over. Note that some simulation models (none in INET, hopefully) may crash when you restart the simulation. This is usually due to badly written destructo
22、r code in the model C++ sources. Now that weve dealt with the basics, we can go back to our ARPTest network model. OK, but what are those flashing link colors? Youve probably seen something like this: If a link is yellow, that means the node is transmitting on the link. If a node has collided
23、 and while its backing off, the link is colored red. Link coloring has been programmed as part of the Ethernet model (the EtherMAC module). The wandering red frame (around router5 on the screenshot) has nothing to do with Ethernet -- it simply indicates the location of the current/next event in th
24、e model, as dictated by the basic event processing algorithm of discrete event simulation. What is inside the hosts and routers? I bet youve found it out already, but here it is for the record: you can double-click on a node (client, server, router) to see its internals. Bottom up, the client m
25、odel contains: an Ethernet interface (eth[0]); network layer (networkLayer, a further double-click will reveal its basically IP); a pinger application (pingApp, defunct in this model); UDP model (udp), also not used in the ARPTest model (no applications configured); TCP model (tcp). T
26、he number of connections in various TCP states are displayed in blue above the icon; an application model (tcpApp[0]) the routingTable module contains, well, the routing table (number of unicast+multicast routes displayed above the icon) blackboard is there for future extensions (it will be
27、 used in in the future as a storage place for various parameters and state variables different protocol layers need to share) A router is similar, but obviously it has nothing from L3 up. (You also see no routing protocols -- routing is static in this model.) If you further double-click on these
28、 components (TCP, UDP, etc.), most of the time youll get an inspector window like this. It means that the component is implemented in C++, and cannot be subdivided any further (it is a simple module, as opposed to compund modules which are composed of submodules). The inspector window exposes the
29、internals of the module and well use it a lot later in this walkthrough, but lets just leave it for now. The ARPTest simulation is quite complex in that it has TCP, IP, ARP and Ethernet in it. In this walkthrough well go for ARP, but the steps you learn will be useful for exploring other protocols
30、 as well. Steps towards exploring ARP If we are interested in ARP, its a bit annoying that we have to wade throught all those Ethernet autoconfig messages until we get to the first ARP request at 1s. Luckily, you can use the "Run until..." function to fast-forward past them. Restart the simulat
31、ion (Simulate|Rebuild network), then click the "Run until..." icon on the toolbar. We know autoconfig finishes at around 1ms simulation time and first ARP request is around 1s, so you can safely enter 2ms in the Run until dialog. After clicking OK, the simulation progresses past the autoconfig p
32、eriod in no time. Then, both the red frame around the laptop icon (the next event marker) and the top line of the status bar will show that the next event is going to take place in the client PC, at t=1s simulation time. Opening "scheduled-events" in the object tree (left side of main window) will a
33、lso reveal that we have only one event, and it is going to occur in the client application (client.tcpApp[0]). Pressing F4 (single-step) repeatedly will take you though the next events. Youll see as the application tells TCP to open a connection, as TCP obeys and sends a SYN (TCP connection reques
34、t) packet, as IP encapsulates SYN into an IP datagram, and sends it down to the Ethernet interface. We could actually peek into those messages and find out about TCP ports and IP addresses and lots of interesting things, but lets resist the temptation and concentrate on ARP. You probably noticed t
35、hat the IP datagram has disappeared in the Ethernet interface. This indicates that eth[0] is a compound module, and if you open it (double-click), youll find that it consists of 3 submodules (arp, encap and mac) and the IP datagram is sitting on the input of the arp module. Here we are at the begi
36、nning of the interesting part. You may actually take a note that we are at event #94 (its displayed in the top line of the main window status bar) so that next time you can quickly get here using the "Run until..." dialog (it can stop either at a simulation time or at an event number -- or if you en
37、ter both, itll stop at whichever comes first.) ARP begins The arp module will tell us whats going on by writing a log. These log messages (output via ev << from the C++ code) will appear in the main text window, but thatll soon be useless because other modules dump their output there too. Luckily
38、, we can open a window which contains arps messages only. Right-click on the arp module, and select "Module output" from the context menu. A new text window, titled "(ARP)arpTest.client.eth[0].arp" will appear. Then press F4 (or click the "Step" icon on the main windows toolbar) to perform the nex
39、t event and let arp process the datagram. Youll see that: the datagram disappers inside arp; arp sends an ARP request the arp text window comments what happened At this point your screen will look something like this. ARP maps L3 addresses (IP address) to L2 addresses (Ethernet MAC addr
40、ess). It uses a lookup table (ARP cache) for this purpose, but if an IP address is not found in the table, ARP has to ask around by sending a broadcast ARP Request. Thats what we have seen here. Lets check it in detail! The ARP Request packet Double-click on the ARP request packet to open its ins
41、pector window, then click the "Fields" tab. The "Fields" page shows the contents of the ARP packet: source MAC address, destination MAC address, source IP address, destination IP address. The source MAC and IP addresses are our own addresses (in the model, autoconfigured MAC addresses begin with "
42、0A AA"); the destination IP address contains the address to be resolved, and the destination MAC address is empty because thats what were requesting. The ARP packet is a single C++ object, with its class ARPPacket having an int _opcode data member, int opcode() and setOpcode(int) functions, and si
43、milar data and functions for the other data fields as well. However, the class was not hand-coded but generated from a .msg file, which has a very concise format: // file: ARPPacket.msg message ARPPacket fields: int opcode enum(ARPOpcode); MACAddress srcMACAddress;
44、 MACAddress destMACAddress; IPAddress srcIPAddress; IPAddress destIPAddress; Definition via a .msg file not only saved a lot of programming effort, but it was also necessary for the packets content to be displayed in the "Fields" page. So far so good, but how do lower layers (Et
45、hernet) know which MAC address the ARP request should be sent to? Thats not part of the packet! This information is attached to the packet in small data structure called "control info". Control info is also a C++ object and similarly to packets, its C++ source is generated from .msg files. You can
46、 view the contents of the control info attached to this ARP packet by clicking the "Control info" tab in the window. // file: EtherCtrl.msg class EtherCtrl fields: MACAddress src; // used with ETHCTRL_DATA MACAddress dest; // used with ETHCTRL_DATA int etherType;
47、 // used with ETHCTRL_DATA and EthernetIIFrame int ssap; // used with ETHCTRL_DATA and EtherFrameWithLLC int dsap; // used with ETHCTRL_DATA/REGISTER_DSAP/DEREGISTER_DSAP int pauseUnits; // used with ETHCTRL_PAUSE It says that source MAC address is not spe
48、cified (all zero -- in this case itll be filled in by Ethernet) and the destination MAC address is all FFs (the Ethernet broadcast address). SSAP and DSAP are unused here (theyre for 802.3 frame type but we use Ethernet II frames in this simulation), and pauseUnits has also no significance (only use
49、d for telling MAC to send PAUSE frames). etherType is set to zero here. The pending queue While ARP resolution is pending, IP datagrams which wait for it have to be buffered somewhere. Theres a "q=1" label next to the arp icon -- if you double-click on it (on the "q=1" text, not on the icon!), an
50、 inspector window will open displaying the queue of buffered datagrams. You may double-click on the SYN line again, to view the datagrams contents (source and destination IP address, TTL, encapsulated protocol, etc.) in an inspector window, much the same way as it worked with the ARP request packe
51、t. One "extra" is worth mentioning, however: on the "General" page youll find the "Encapsulated message" button which will take you to the TCP packet in the datagram -- and you can continue exploring the TCP header fields. The ARP cache Youve noticed the blue letters "1 cache entries, send req:1
52、repl:0 fail:0" above the arp icon, and wondering what the ARP cache contains right now. No problem, we can check it out! Double-click the arp icon (or right-click on it and select "As object..." from the context menu). An inspector window will open, with several pages like the message inspector --
53、 youll need the "Contents" page now. The list reveals that we have several counters here for sent and received ARP requests etc, a queue for IP datagrams pending ARP resolution -- and also the ARP cache. Double-click on the arpCache line. Another inspector will open, this time the following one:
54、 First of all, youll notice that the cache contains what youd probably expect: one entry, IP address 10.0.0.1, pending resolution. (The "Detailed info" line on the first page would show only the first three entries, hence the second page -- it is also easier to browse if therere many entries in the
55、cache.) Second, if youre familiar with C++, youll notice that the ARP cache is implemented with a standard STL map. The key in the map is class IPAddress and the value is struct ARPCacheEntry (or rather, a pointer to it). If youd be looking in the C++ code to find out what makes STL map able appea
56、r like this in the GUI, youd find only one extra statement: WATCH_PTRMAP(arpCache), plus << operators defined for IPAddress and ARPCacheEntry. Thats all it takes -- the rest is up to the simulation environment. But let us follow the ARP request further. Transmission over Ethernet With a further
57、 F4 key (or "Step" toolbar button), encap will encapsulate the ARP request into an Ethernet II frame. You can verify by double-clicking on the message and opening an inspector that the destination address in the frame has been set to broadcast (all FFs). The source address is still all zeros, itll b
58、e set by MAC. On the "General" page you can verify that the ARP packet has been indeed encapsulated in an Ethernet frame. (You can close all other inspector windows now, except the arp text window.) The next F4 key, the frame gets into macs buffer. (Note that "q=0" has changed into "q=1" -- if you
59、 double-click on the text, youll actually see the queue where the frame is buffered.) But why is it not transmitted immediately? If you peek into the log in the main window, the solution is there: it says "wait IFG first". IFG stands for Inter-Frame Gap in the Ethernet standards, and it is the time
60、needed by older Ethernet hardware to switch from receive (carrier sense) mode to transmit mode. In the model, end of the IFG is marked with an event which can also be seen in "scheduled-events". Hitting F4 again makes mac process the EndIFG event, and start transmitting the frame. The icon and als
61、o the connection arrow turns yellow, indicating that a transmission is going on. Most actions weve seen so far, from apps TCP Active OPEN command to encapsulation of the ARP packet into an Ethernet frame, took zero simulation time. We assumed that -- compared to other time periods occurring in the
62、 model -- they take such a short time that it is not worth modelling explicitly (they wouldnt make a difference in the simulation results). However, the time an Ethernet frame transmission takes is interesting to us, and so is propagation delay on the cable (the cable may be long) -- so in fact we
63、 have four discrete points of time, and we need four simulation events to model them: transmitter starts transmitting the frame beginning of frame reaches receiver (start receiving) transmitter completes transmission end of frame reaches receiver (end of reception) The message which yo
64、uve seen mac having sent (the Ethernet frame message object in fact) represents the beginning of the frame. End of transmission is an event youll find in "scheduled-events", it is a self-message scheduled by the transmitting mac: The "start of reception" event will occur in the receiver of course,
65、 and will be represented by the arrival of the Ethernet frame message object. You can see in the first line of the status bar, in the "next event" field that its going to be the next event, and will take place in router1s second interface (eth[1]). Open the graphics for this Ethernet interface by
66、double-clicking on router1, then on eth[1] (just follow the red frames which indicate the location of the next event). Pressing F4 once more makes this mac process the event and go into "receiving" state -- its icon will also turn blueish to indicate it. From the frame length and the data rate mac has calculated the time the last bit will arrive (end reception), and scheduled an event accordingly (you can verify it
- 温馨提示:
1: 本站所有资源如无特殊说明,都需要本地电脑安装OFFICE2007和PDF阅读器。图纸软件为CAD,CAXA,PROE,UG,SolidWorks等.压缩文件请下载最新的WinRAR软件解压。
2: 本站的文档不包含任何第三方提供的附件图纸等,如果需要附件,请联系上传者。文件的所有权益归上传用户所有。
3.本站RAR压缩包中若带图纸,网页内容里面会有图纸预览,若没有图纸预览就没有图纸。
4. 未经权益所有人同意不得将文件中的内容挪作商业或盈利用途。
5. 装配图网仅提供信息存储空间,仅对用户上传内容的表现方式做保护处理,对用户上传分享的文档内容本身不做任何修改或编辑,并不能对任何下载内容负责。
6. 下载文件中如有侵权或不适当内容,请与我们联系,我们立即纠正。
7. 本站不保证下载资源的准确性、安全性和完整性, 同时也不承担用户因使用这些下载资源对自己和他人造成任何形式的伤害或损失。
